Everything is always evolving, even lifting equipment. Demag products are always evolving to a new level to bring in the latest technologies to better serve your requirements. With this being written in 2023, the Demag E22 electric travel drive, found on KBK bridge and hoist trolleys, was replaced by the E22C travel drive roughly 5 years ago. Read more about identifying which model you’re working on and setup so you’re ready when your customer calls.
Demag E22C Travel Drive
Found on Demag light lifting products, the E22C travel drive is an electric drive for use on Demag KBK crane bridge and hoist trolleys. Electric drives make travel movement safe and ergonomic, eliminating manual travel motions for high capacity or fragile loads. It’s easily integrated for use with the Demag DC chain hoists to be controlled by a single pendant or radio system.

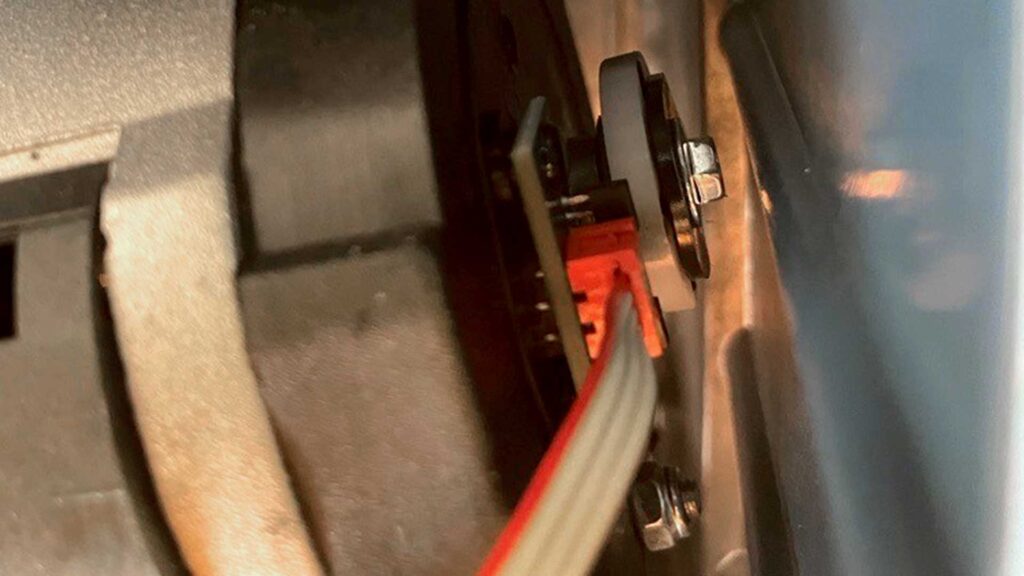
The current E22C trolley includes speed monitoring with an encoder monitoring the speed at the output of the drive. It is programmable through the pendant without opening the cover, unlike the prior generation product. Programming the drive this way transfers the parameters from the master unit to the slave unit automatically, reducing cabling and wiring with the ability to input stepless setpoint values. The prior model generation of Demag electric trolley drive was the E22 electric travel drive. Unlike, the E22C, the E22 drive did not have speed monitoring.
Differences Between the E22C and E22 Travel Drives
As a crane service technician, you’ll be called upon to install, troubleshoot and diagnose issues with both the E22C and E22 trolley. It’s important to know which model version you’re working on since setup is different. The easiest way to determine which model you’re working on is a simple visual check when you arrive to the job site. If there is a 7 segment display visible from the floor, you are working on a E22C model electric trolley.

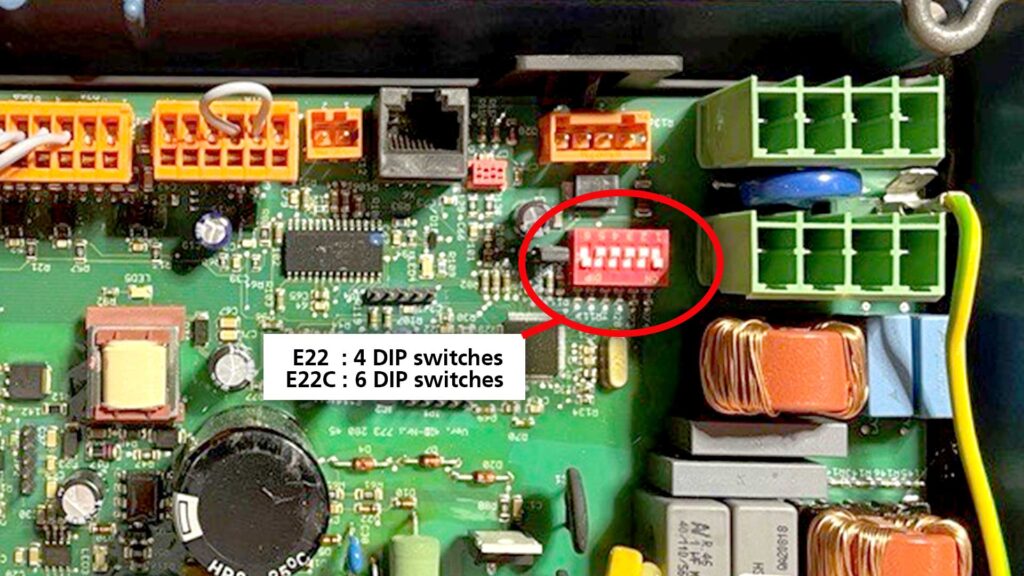
Another way to visually determine which model you’re working on is counting the number of dip switches. The E22 travel drive has 4 dip switches, while the E22C has 6 dip switches. Proper set up of both the E22 and E22C travel drive requires the DIP switches and jumpers to be configured correctly for the application.
Installation and Service Notes of the E22 Travel Drive
After determining you are working on the E22 model, the setup will differ. The 7-segment display will be visible after opening the cover and it does not have an connectable terminal for diagnosis. During troubleshooting the E22 travel drive, you may determine a new control board is necessary. If this is the case, please note, the E22 control board was discontinued so you will replace the entire drive unit with an E22C.
Exploring the DIP Switches and Plugs on the Control Board of the E22C
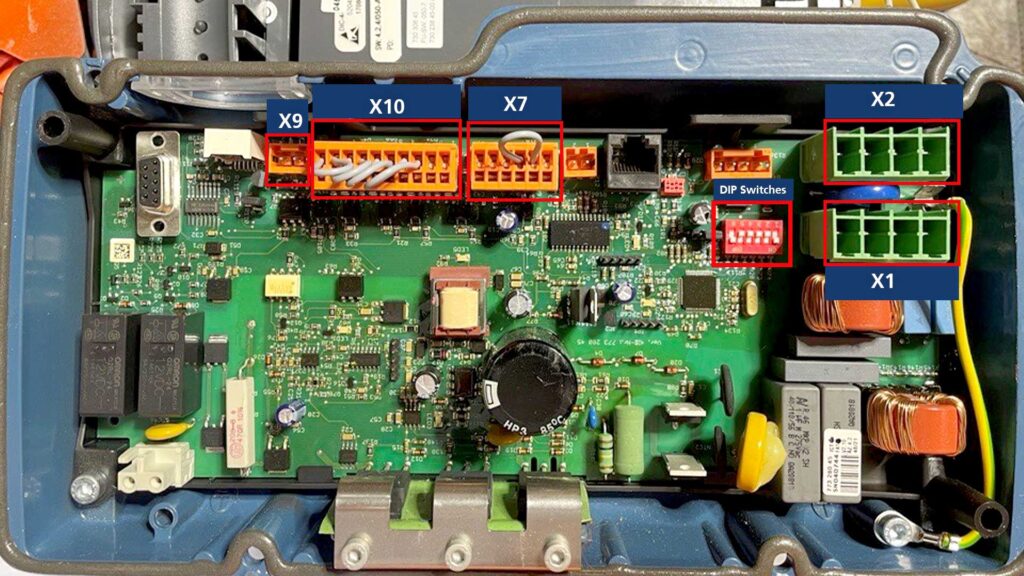
When you have determined you have an E22C model travel trolley, the six DIP switches should be configured based on the application. The DIP switches determine whether the travel drive uses speed monitoring and whether it uses speed monitoring with a slave drive. Select the DIP switch configuration you need by referencing page 55 of the assembly instruction. (Document # 21480944 for English language)

The plugs power and further configure the E22C travel drive to meet the application needs. These plugs can be used with or without jumpers, depending on your application requirements. To start setup, the X1 plug is the line voltage in and X2 is the line voltage out to the hoist.
Other important plugs include the X7, X9, and X10. The X7 plug is dive control in solo hoist applications. A jumper is installed from the factory from X7.2 – X7.3. Remove the jumper if the E22C drive will be used in a crane application.
The X9 plug is the enable circuit for solo operation (trolley), requiring a jumper from X9.2 – X9.3. In crane applications, the Crane (Master) will be wired to the Slave in this plug.
Optional travel limits are set on plug X10. Depending on your customer’s requirements, limit switches are optional for cross travel and long travel drives when it is being controlled with a pendant. Limit switches can be programmed to set fast to slow left and right and final limit left and right for cross travel drives on the DC or DCS 1-15 models when using a DRC radio.
Setting Parameters on the E22C Travel Drive
Although the default parameters provide optimal performance for most applications, programming parameters in the E22C further tailor the travel drive to your requirements. Parameters like maximum speed, acceleration, and deceleration can be programmed though connection of the control unit and the 7-segment display. Reference the assembly instruction documentation for full instructions and a full listing of parameters. (Document # 21480944 for English language)
The E22C travel drive replaced the E22 travel drive a few years ago, making the newer model more service friendly. As a service technician called to install this travel drive, first determine which model you’re working on by looking for the external 7-segment display or by opening the service cover to count the DIP switches. From there, determine the proper setup of the switches to tailor the travel drive to your customer’s requirements.
- Precise Control & Digital Interface | Demag DMI Inverters - May 7, 2024
- Demag DRC-DC Radio Control System: Efficient Transmitter Replacement - March 26, 2024
- Navigate Model-Specific Codes | Modern Demag Light Lifting Products - November 21, 2023
