I wear many hats at Demag. You see me authoring Demag technical blog posts and helping you through our YouTube Tech Tip videos. Our authorized dealers in the USA and Canada also know me as one of the two point persons on our technical support phone line. Since starting to track the subjects of our technical support calls in March 2020, we recently surpassed the milestone of 10,000 calls. We see trends within these 10,000 calls where we can create content to help you.
Many of our service calls with our dealer partner technicians require a technician to check the 3-phase Demag AC motor to determine if a new motor or a rewind of the old motor is needed. This troubleshooting can be applicable when you are working on a 3-phase motor on a Demag hoist, trolley, or bridge drives. Sometimes we will hear a motor making noise while on the call or receive recordings of a growling motor. We’ve put together a troubleshooting guide for checking the Demag 3-Phase AC motor.
Remember to always follow all electrical safety protocols and take proper safety precautions when working on energized equipment.
General Visual Inspection
- Check the external appearance of the motor. Look for signs of mechanical damage like dents or broken cooling fins and covers.
- Inspect the motor for any obvious burn marks, signs of excessive heat and/ or environmental damage.
- Examine all external features including feed cables. Many times, we find evidence of wire damage from a passing trolley snagging a festoon cable, conductor dry rot, or fatigue of festoon conductors after long term use.
Functional Test Inspection
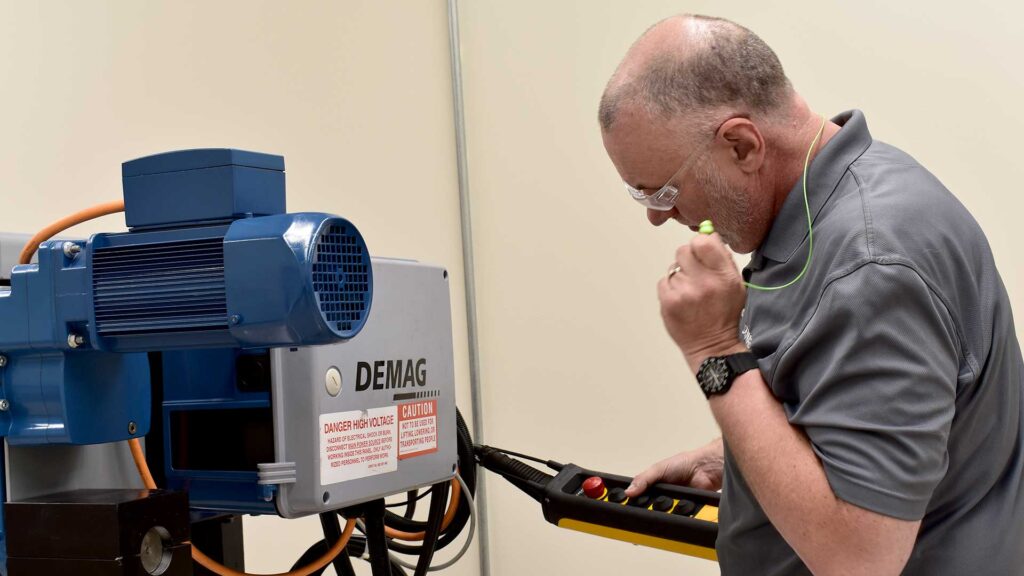
- Run the crane and listen for any unusual noises while running.
- Motors should operate smoothly and change speeds and directions when corresponding buttons are pushed.
- If growling is heard, stop running the motor immediately. This is a sign of a common electrical problem known as “single-phasing.” It happens when a phase of the feed power is disrupted or missing. Many times, this can be attributed to a broken wire or a loose connection. It can also happen if an internal winding inside the motor is burned out or a contactor is burning out.
- Contactor controlled equipment with internal contactor issues may cause this loss of phase condition. Associated contactors always require further scrutiny. Contactors must be checked for excessive resistance with an ohmmeter across their high voltage switch points when they are closed.
- Also check for voltage drop by comparing feed voltage to output voltage with a voltmeter. Never forget that bad contactors can cause motors to go bad, and vice versa. Never simply replace the motor without checking its associated contactors.
- Listen for any other mechanical noises like grinding or squealing. If brake adjustments are ignored, internal parts of the motor can rub together and work for a while before shorting out. Bearings tend to make high pitch squealing noises when they are failing.
- Tip: Place your hand on the end of a screwdriver and put your ear on the back of your hand to create an impromptu form of a stethoscope or use an industrial stethoscope like car mechanics. This lets you listen to the inner workings of a running motor. Take care when making this type of check.
- Watch for any excessive vibration. Mechanical issues with shaft wear and bearing failures will cause out of round rotation and vibrations can occur.
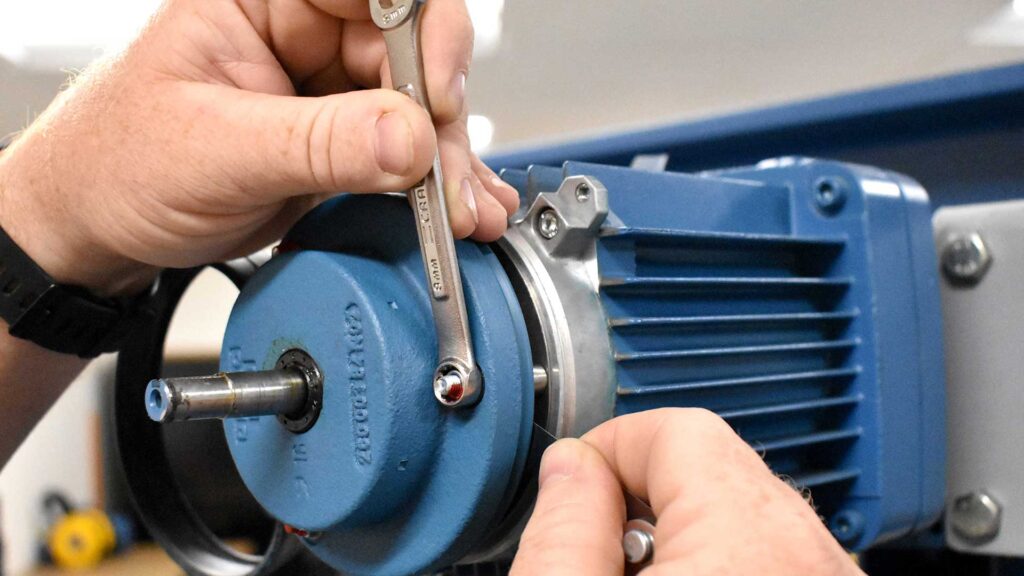
General Inspection After Minor Disassembly – Powered Turned OFF
- Open the terminal box and examine the connections. Make sure they are intact and look for any wear or damage. Replace any wires, plugs, or electrical parts, like varistors or brake rectifiers, showing damage.
- Sniff for any odor of burning resin coming from the internal windings. Burnt resin indicates the motor has been exposed to excessive internal temperatures and will require replacement or rewind.
- If you detect the smell of burning oil, it is likely a failed front seal on a motor with direct attachment to a gearbox. Demag DR hoists with bad front seals can allow oil to contaminate the stator. Oil can be cleaned by a motor shop, but some front oil seals are not replaceable. Check the hoist parts manual to determine whether the seal can be changed. If a seal part number is showing, it can be replaced. Those parts breakdowns showing only a front flange and rotor assembly will not have an accessible seal due to pinion size. A new motor may be in order.
- Remove the fan cover and check the condition of the brake, brake coil magnet body, fan, and motor shaft for any damage.
Winding and Thermal Overload Continuity Test – Power Turned OFF
- Using the ohmmeter function of your multimeter, check continuity of each winding. If there is no continuity, the winding is compromised having been burned open. Check these point-to-point combinations: 1U-1V // 1V-1W // 1U-1V and 2U-2V // 2V-2W // 2U-2V
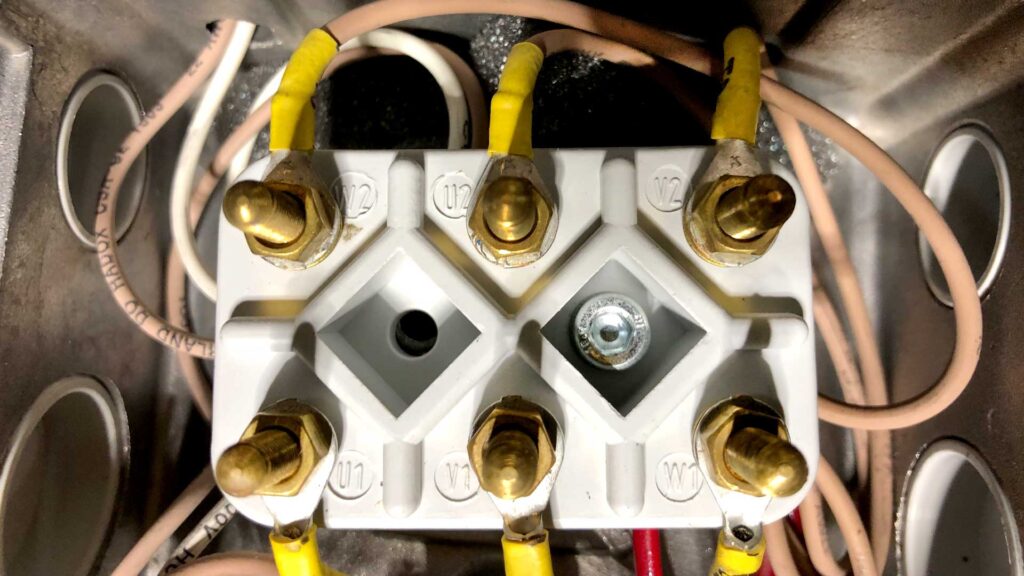
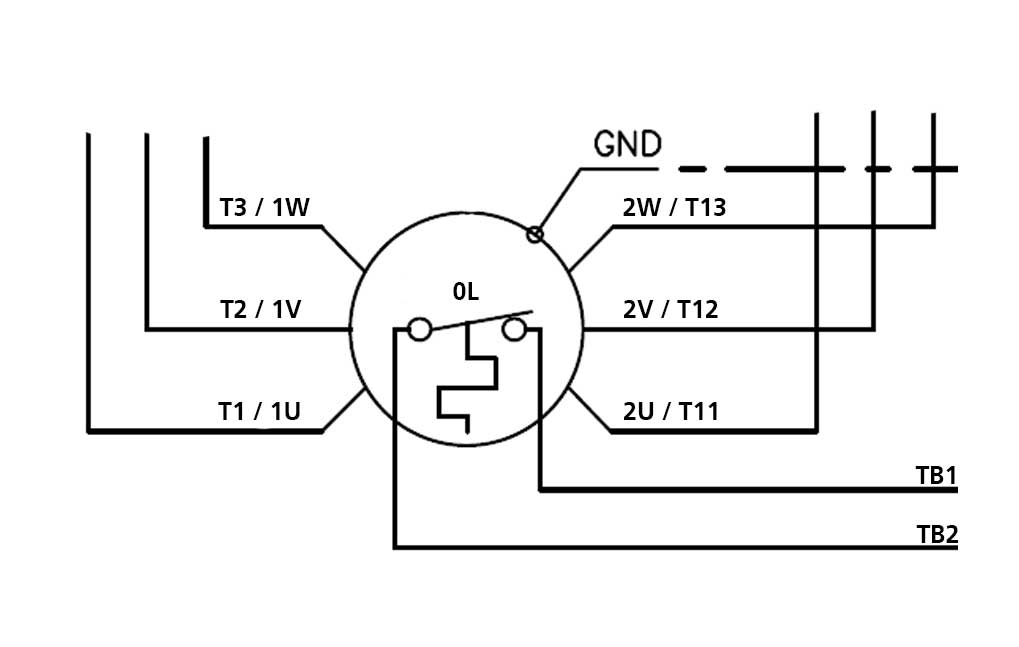
These labels can be found molded on the terminal block inside the motor terminal box. Hoist motors have power feed wires with a T prefix (T leads) so here is a common crossover drawing to help check continuity. Note the thermal overload is also shown.
- Using the ohmmeter, check each motor terminal for continuity to ground. If internal windings are found shorting to ground, you should also find blown fuses or a blown circuit breaker.
- Using the ohmmeter, check the continuity of the thermal overload switch circuit which should read normally closed and have continuity. It is a bimetallic switch imbedded in the windings during manufacturing of the motor. Wires of the windings are a smaller gauge than those for connecting windings and have tan colored insulation. These wires come up through the hole in the stator along with the motor winding connection wires.
- Using the ohmmeter, check each motor winding connection terminal for continuity to each wire in the thermal overload switch circuit. Any continuity found means there is an internal short.
- Using the ohmmeter, check the thermal overload switch wires continuity to ground. The small control circuit fuse located on or near the transformer will blow out if this circuit is shorted to ground.
Winding Resistance Comparison – Power OFF
- Use the ohmmeter to read the actual resistance of the motor windings in ohms. The terminals are labelled in a common European manner as 1U, 1V, 1W, 2U, 2V and 2W. Make sure your meter is set to ohms. The prefix 1 indicates low speed and prefix 2 indicates high speed so the combinations to check are: 1U-1V // 1V-1W // 1U-1V and 2U-2V // 2V-2W // 2U-2V
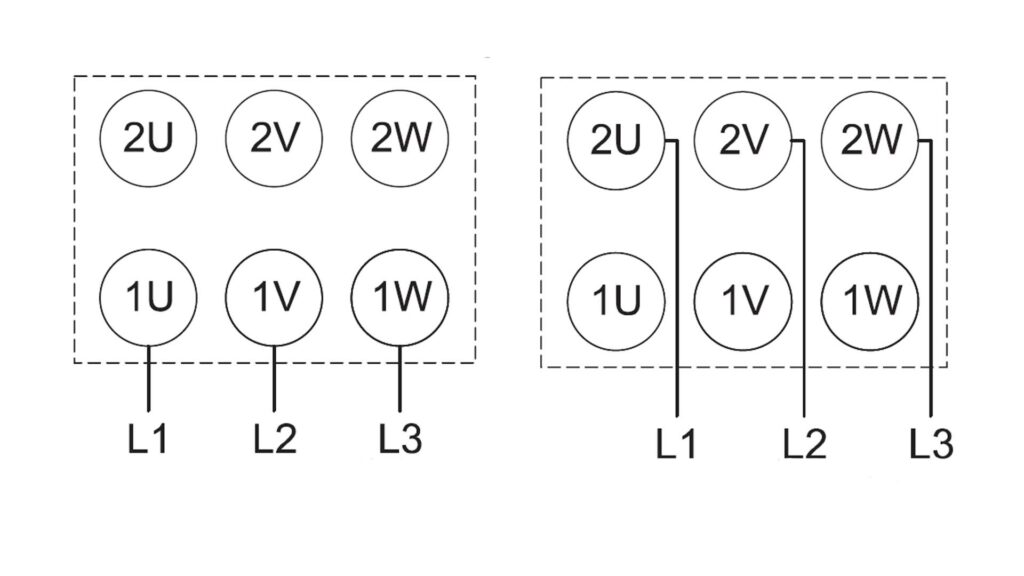
- Record and compare the findings. Each combination beginning with 1 should have the same ohm reading and each combination beginning with 2 should have the same reading.
- Any deviation indicates internal issues with the windings and the motor will need to be replaced or rewound. For this check, the key is getting 3 similar readings.
Running Amps Test – Power ON
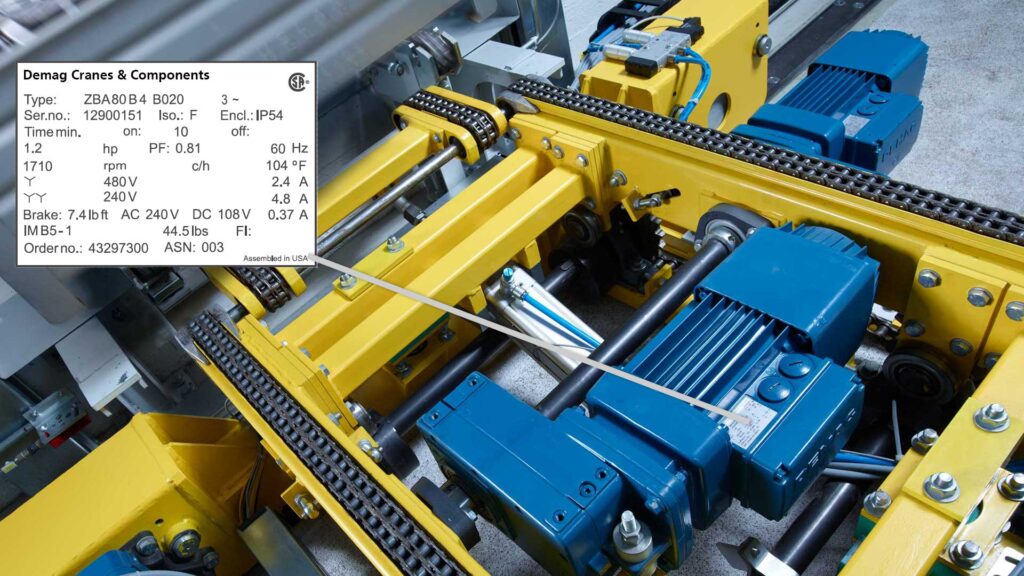
With the motor running, check the full load amps with your clamp-on ammeter and compare to the value on the data plate. Find ratings printed on the data plate of Demag motors located on or near the motor terminal box. Deviations detected from printed rating indicate problems are developing.
A key part of troubleshooting Demag hoists, trolleys, and bridge drives can be the 3-phase AC motor. Following the troubleshooting tips in this article can help determine the origin of electrical issues affecting a motor. Once these checks are made, it is clear if a new motor should be ordered. Understanding these troubleshooting concepts will allow crane service technicians to be confident when they provide advice to their customers.
Read more about using manufacturers documentation for effective maintenance and repair.
See more Demag service tips on our YouTube channel: Demag Cranes North America. Subscribe today!

- Understanding Wire Rope Lay for Your Next Wire Rope Hoist Repair or Inspection - December 21, 2023
- From Customer to Demag USA Technical Trainer - May 9, 2023
- Diagnosing Additional Error Codes on Demag CANBUS Hoists and Cranes - March 28, 2023